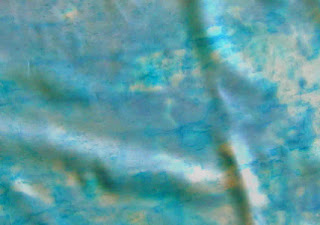
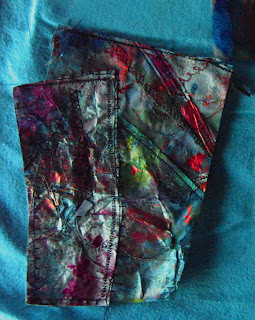
I read somewhere a long time ago about painting outside in below freezing temps. I decided to try it recently during our ice storm. I used a piece of light weight canvas and hung it outside for a few hours. Then I brought it in laid it on a rack and painted it with Stewart Gill fabric paints. The fabric thawed so quickly it was really not icy while I was finishing the painting. But, I am not going to paint outside during an ice storm so my ice painting is not quite authentic.You can see the ridges made by the rack in the photo. This is before I ironed it to set the paint.
Thursday, January 28, 2010
My snow dying process
The two red pieces and the purple/blue/red a couple of posts below are all made from a white sheet an exchange student left at my house a couple of years ago.
I bought the supplies from Dharma Trading company
I prewashed the fabric in Synthropol. Then I soaked it in a soda ash solution. While it was soaking I prepared my urea and salt chemical water. I laid the fabric out on several different types of racks. The article I read in Art Quilting stated that she used a piece of plexiglass and tilted it into a pan so that the fabric did not sit in the excess dye. I used two small pieces of plexi tilted in my favorite pan (it is designed for fish cleaning and sold at sporting goods stores).
I also used a small baking rack over a dish pan and a shoe box sized plastic box. In the bottom of the plastic box I placed some bubble wrap with really large bubbles. I also slanted this so the dye would run down.
I then put the wet fabric on the racks and covered it with snow.
I mixed the dye two tables spoons to a half cup of chemical water. Then poured it on over the snow. I then covered it with plastic bags and left it overnight.
The next day I sprayed all of the fabric with warm water, wrung it out and hung it to dry. I will wash it with synthrapol in a few days.
Blue on black and white
You can get a good dark blue with this process. I made up a chemical mix of urea and table salt and mixed it with the blue dye. I just added half a cup of water to 2 tablespoons of dye.
I laid the fabric out on a rack slightly tilted and then covered it with snow. Then I covered it with plastic and left it overnight. I rinsed this fabric with warm water (I have a hose with a sprayer in the basement and I just sprayed the water on) Very little actually rinsed out and the final rinse came out clear.
I laid the fabric out on a rack slightly tilted and then covered it with snow. Then I covered it with plastic and left it overnight. I rinsed this fabric with warm water (I have a hose with a sprayer in the basement and I just sprayed the water on) Very little actually rinsed out and the final rinse came out clear.
Tuesday, January 19, 2010
Snow dyeing results
Snow dyeing
I have been reading about snow dyeing and since we have piles of snow all around I decided to give it a try. I just used what I already had around and it wasn't the best dye for the projects. Most of my results are quite faded looking. I am ordering new dye to try to get better results.
This is what the snow dyeing process looks like. You put down your fabric (or paper) on a rack and then pile on the snow. Then you pour on the dye. As the snow melts the fabric gets dyed.
Monday, January 11, 2010
Paper cloth (Fabric paper ???)
This is a close up of a piece that I painted heavily and then scratched with the brush handle. This is some of the Stewart Gill fabric paint that I bought recently, such a beautiful color, magenta.
Sunday, January 3, 2010
Liberated quilting
 Last fall when I was first interested in quilting, I checked Gwen Marston's book Liberated Quilting out from the library. I really love her quilts and ideas. I started making little houses shown in her book and then decided to make them into a quilt for Miles. Now let's face it, what I knew about making a quilt could be put in a thimble. So I just made it up as I went along. This is the result. I backed it with fleece and tied it with crochet cotton and some buttons. It is not just "liberated" it is down right odd. I keep looking over my shoulder to see if the quilt Police are coming. Lots of the fabric I got from Guinevere, my dear daughter in law and some of them were left over from the crib sheets and accessories she made when he was a baby.
 Christmas stocking
this stocking for grandson Miles just before Christmas. It was really fun and took only a few hours. That's because I practiced on the Victorian boots.
Subscribe to:
Posts (Atom)


 This is the boot I made for the swap.


